
We often have in excess of 30 volunteers at our trail days. Different jobs require different tools eg various rakes for cutting in new trails, shovels and mattocks for building jumps and berms and fixing drainage. This means that we have acquired over 60 hand tools. Our storage container was becoming a tangled mess; impossible to find the tools we were looking for and taking ages to load up or pack away. When one of our volunteers donated a large quantity of structural timber from some shelves that were no longer required we set about designing a tool storage solution.
The requirements were:
- Free standing (shipping containers are not the easiest to drill in to)
- Cope with the 5 degree list of the container
- Hold up to 60 tools
- Ideally tools sorted by type so we can quickly access any tool easily
A search of the internet didn’t provide any great inspiration; only pictures of 1 spade, 1 fork and 1 rake hanging on nails in a garden shed. So armed only with our own ingenuity we came up with this design which consists of pairs of prongs that the tools hang upside down from. The prongs are supported by a simple portal frame that doesn’t impede with the tool handles.
As we had access to a structural design and analysis software package we knocked up a quick model, mainly to check deflections and to get some material length take-offs.
The donated timber was almost perfect in size and quantity with larger sections used for the frame. Screws were donated from Trail Day Sponsor United Fasteners. After a few evenings in the shed cutting everything to length, it was then a matter of screwing it all together on site.
A few things that we have added and that have worked out really well:
- The tools we use the most (mattocks and shovels) are nearest the door
- The labels on the ends of the prongs indicate which tool type lives in that row so anyone can help pack up. In the case of the mattocks it even shows which orientation to hang them (one prong is deliberately slightly lower than the other to match the shape of the heads)
- The number in white board marker on the wall behind each row indicates the number of those tools that should be on the rack. After a trail day if some are missing we will know (see our previous post on trying not to lose tools)
- Since we built the stand we have bought even more tools – including several heavy Rake n Bakes. The stand was doing ok but to be safe we have re-enforced it with two vertical beams at the front middle. Some stiffness here probably should have been in the original design; previously the weight of all the tools was acting on a cantilever
Overall we are delighted with our creation. It has saved us lots of time, keeps the container much tidier and allows us to keep much better track of our tools – we have definitely gone back and found a few that are missing that we wouldn’t have known about previously.
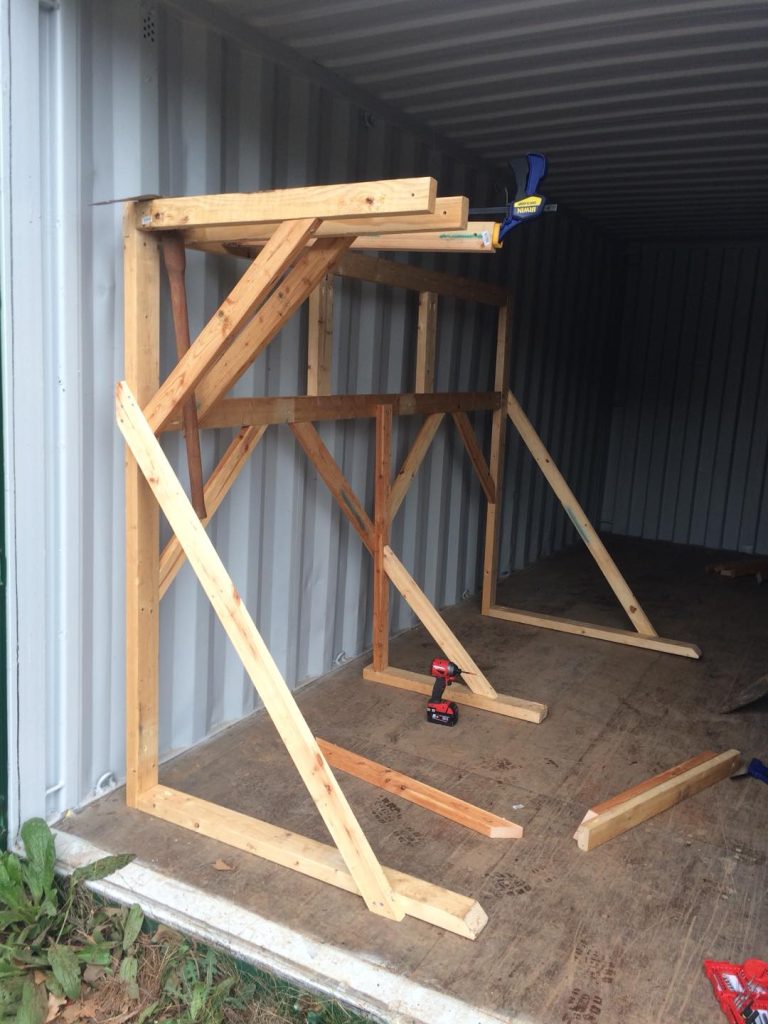
Construction time 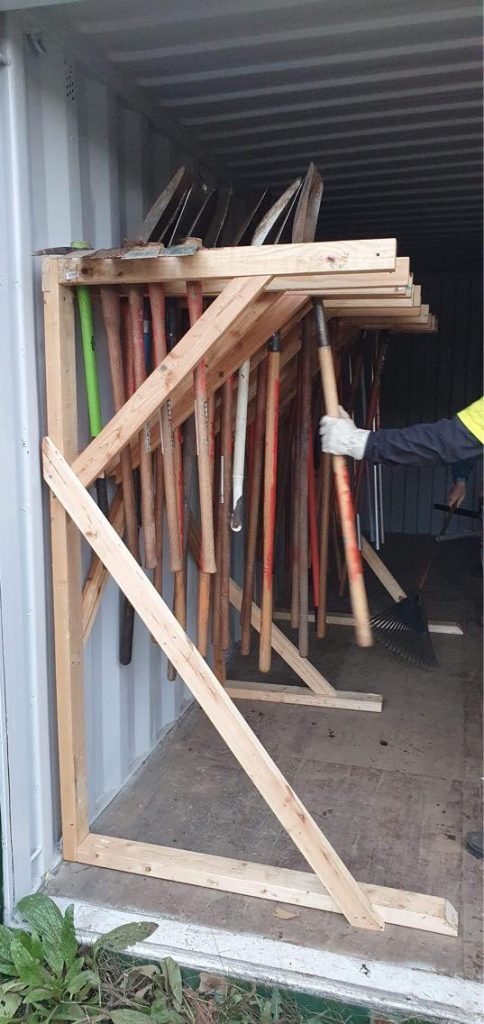
A joy to use 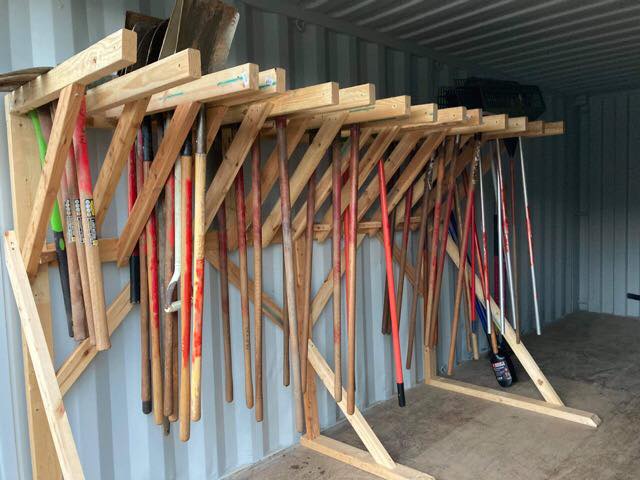
All tools safely hung 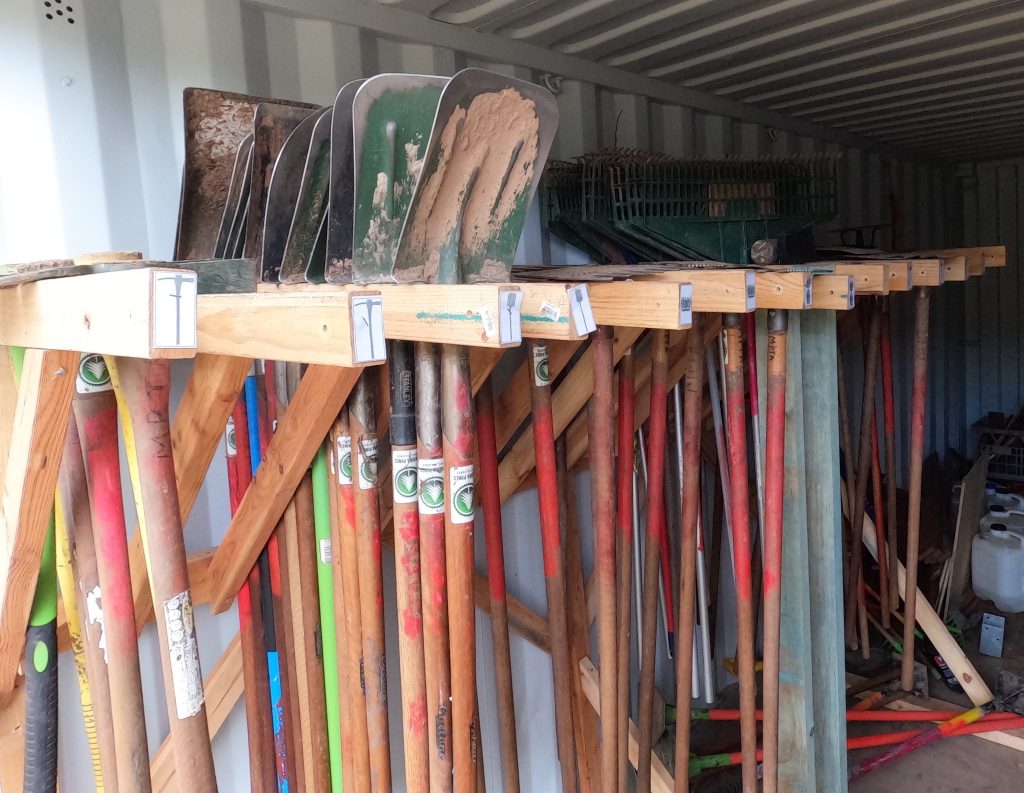
The green-ish timber is the recent addition 
Tool type and number